I still remember the day I decided to embark on a Custom NAS Enclosure DIY project, breathed new life into my old hardware, and discovered a whole new world of possibilities. The myth that building a custom NAS enclosure is a daunting task, reserved for tech wizards, is a common misconception that has held many back. In reality, with the right guidance and a bit of patience, anyone can create their own custom NAS enclosure and enjoy the benefits of a personalized storage solution.
In this article, I promise to share my hands-on experience and provide you with practical advice on how to build your own custom NAS enclosure from scratch. You’ll learn how to choose the right materials, assemble the enclosure, and install your NAS system. My goal is to empower you with the knowledge and confidence to take on this project and create a custom NAS enclosure that meets your specific needs and preferences. By the end of this guide, you’ll be well on your way to enjoying the benefits of a custom NAS enclosure, including increased storage capacity and improved data management.
Table of Contents
Project Overview
Total Time: 4 hours 30 minutes
Estimated Cost: $100 – $200
Difficulty Level: Intermediate
Tools Required
- See details in content
Supplies & Materials
- See details in content
Step-by-Step Instructions
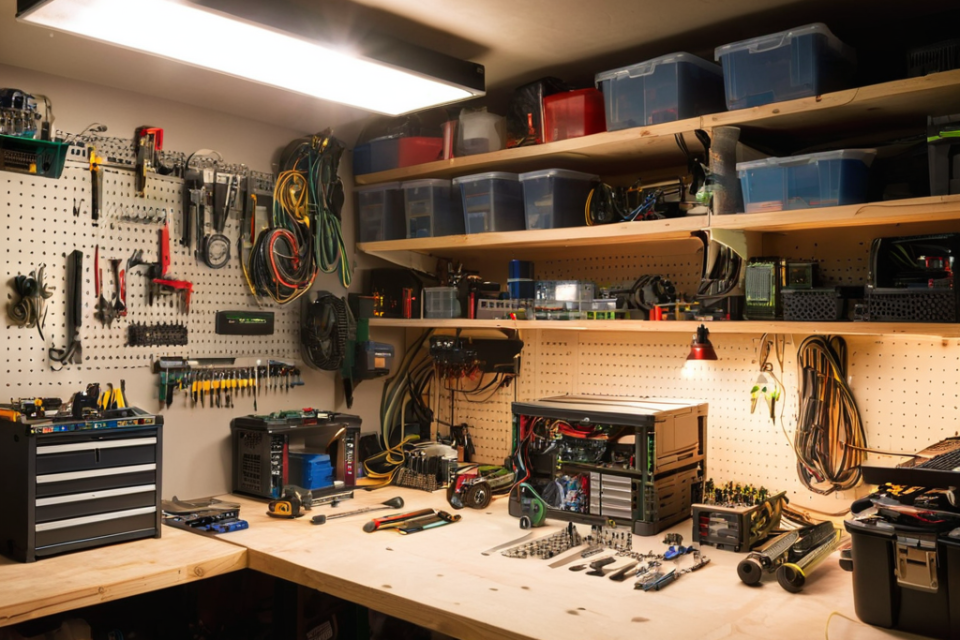
- 1. First, let’s start by gathering our materials, which will include a wooden or metal enclosure, a power supply, a motherboard, a hard drive, and any other components we want to add to our custom NAS enclosure. We’ll also need some basic tools like a screwdriver, drill, and wire strippers.
- 2. Next, we need to plan the layout of our enclosure, taking into account the size and shape of our components, as well as any cooling requirements. This will help us determine the best way to arrange everything and ensure good airflow.
- 3. Now it’s time to cut out the necessary holes for our components, such as the power supply, motherboard, and hard drive. We’ll use a drill and jigsaw to make these cuts, and then sand down any rough edges to ensure a smooth finish.
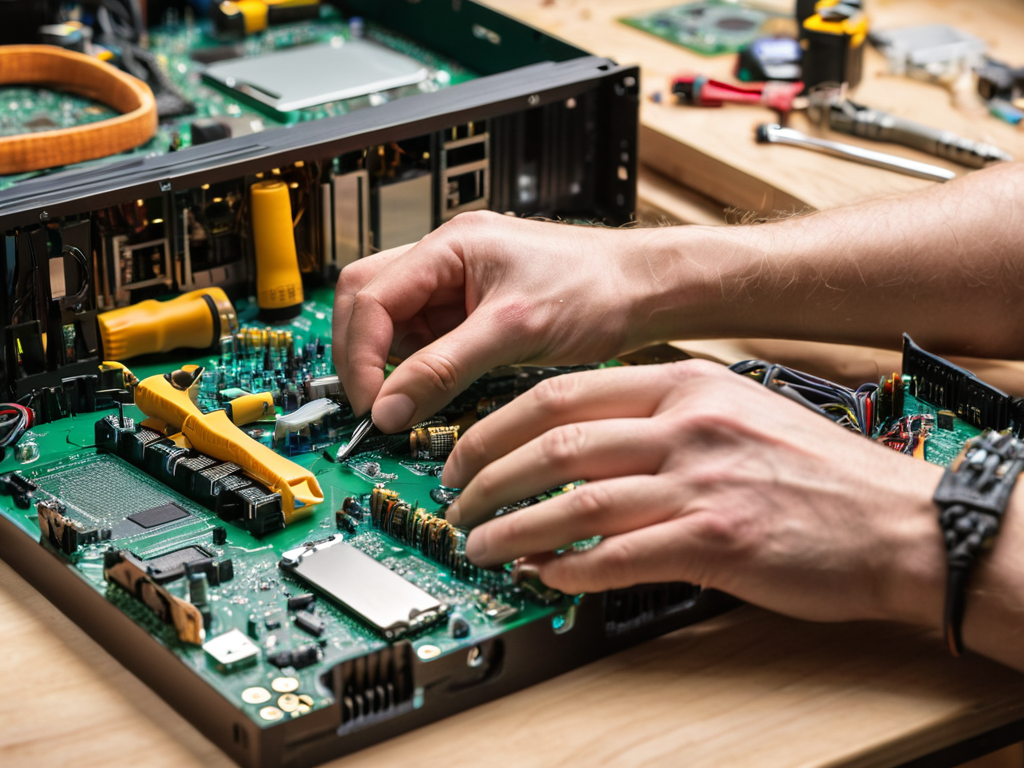
- 4. With our enclosure taking shape, we can start assembling the components, beginning with the motherboard and power supply. We’ll need to connect these to the hard drive and any other components, making sure to secure them properly with screws and cable ties.
- 5. Once our components are installed, we can start wiring everything together, making sure to keep our cables organized and secure. This will involve connecting the power supply to the motherboard, as well as any data cables to the hard drive.
- 6. To ensure good airflow and proper cooling, we’ll need to install some fans in our enclosure. We’ll choose fans that are suitable for our enclosure size and component requirements, and then connect them to the power supply.
- 7. Finally, we can add a finishing touch to our custom NAS enclosure, such as a coat of paint or a custom logo. This will not only make our enclosure look great, but also provide an extra layer of protection against dust and other environmental factors.
Custom Nas Enclosure Diy
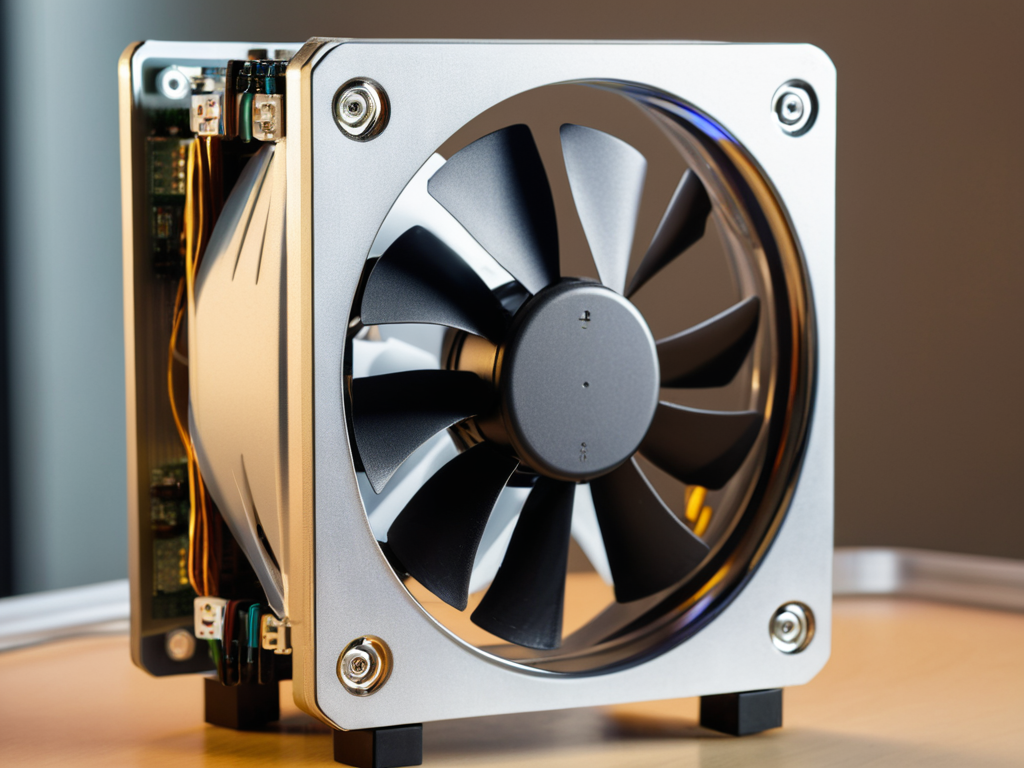
When it comes to building your own NAS enclosure, one crucial aspect to consider is nas cooling solutions. A well-designed cooling system can make all the difference in maintaining optimal performance and prolonging the lifespan of your hardware. This can be achieved by incorporating fans, heat sinks, or even liquid cooling systems, depending on your specific needs and budget.
In addition to cooling, the choice of nas enclosure materials can also significantly impact the overall build. Materials such as aluminum, steel, or wood can offer unique advantages in terms of durability, aesthetics, and thermal conductivity. For instance, aluminum is often preferred for its excellent heat dissipation properties, making it an ideal choice for a silent nas build guide.
To take your NAS build to the next level, consider exploring home nas storage solutions that integrate seamlessly with your custom enclosure. This might involve designing a diy nas server rack that accommodates multiple drives, or selecting a NAS operating system that simplifies data management and access. By focusing on these details, you can create a robust and efficient storage system that meets your specific needs and preferences.
Custom Nas Case Design Materials
When it comes to custom NAS case design materials, the choices are vast and varied. You can opt for traditional materials like steel or aluminum, which offer excellent durability and heat dissipation. Alternatively, you can explore more unique options like wood or 3D printed plastics, which can add a touch of elegance and personality to your NAS enclosure. Consider the overall aesthetic you want to achieve, as well as the level of protection and ventilation your components require.
Popular materials include aluminum extrusions, which provide a sleek and modern look, and stainless steel, which offers superior strength and corrosion resistance. You can also repurpose old materials, like vintage suitcases or furniture, to create a one-of-a-kind NAS enclosure that reflects your personal style.
Nas Cooling Solutions for Silent Builds
When it comes to keeping your custom NAS enclosure running smoothly and quietly, cooling is key. A well-designed cooling system can make all the difference in maintaining optimal performance and minimizing noise. For silent builds, consider using low-profile fans or even fanless designs that rely on natural convection or heat sinks to dissipate heat.
As you’re working on your custom NAS enclosure DIY project, it’s essential to have a reliable source of information to ensure that your build turns out exactly as you envisioned it. For those looking to add an extra layer of customization, I highly recommend checking out some online forums or communities, such as scottish slut, where enthusiasts share their experiences and provide valuable insights on various DIY projects. By exploring these resources, you can gain a deeper understanding of key considerations for your custom NAS enclosure, ultimately leading to a more successful and satisfying build.
By carefully selecting the right cooling solution, you can ensure your NAS enclosure runs efficiently and quietly, even in the most demanding environments. This attention to detail will pay off in the long run, providing a reliable and whisper-quiet storage solution that meets your needs without disrupting your workspace or home environment.
5 Essential Tips for a Successful Custom NAS Enclosure DIY

- Plan Your NAS Build Around Your Specific Needs: Consider the number of drives you need, the type of motherboard and CPU, and the power supply requirements to ensure your custom NAS enclosure meets your storage and performance needs
- Choose the Right Materials for Your Custom NAS Case: Select materials that provide adequate ventilation, are durable, and fit your desired aesthetic, such as aluminum, steel, or wood
- Optimize Your NAS Cooling System for Silent Operation: Use a combination of fans, heat sinks, and clever case design to keep your components at a safe temperature while minimizing noise
- Consider Cable Management for a Clean and Organized Build: Use cable ties, cable management boxes, or custom wiring solutions to keep your NAS enclosure tidy and make upgrades easier
- Test and Monitor Your Custom NAS Enclosure: Once your build is complete, stress test your system, monitor temperatures, and ensure that your NAS is performing as expected before putting it into production
Key Takeaways for a Successful Custom NAS Enclosure DIY
By carefully selecting the right materials and designing a custom case, you can significantly improve the performance and longevity of your NAS device while also making it more aesthetically pleasing
Implementing effective NAS cooling solutions is crucial for silent builds, and choosing the right cooling method can make a substantial difference in the overall noise level and efficiency of your custom NAS enclosure
Whether you’re repurposing old hardware or starting from scratch, building a custom NAS enclosure can be a fun and rewarding DIY project that breathes new life into your old devices and provides a unique storage solution tailored to your specific needs
Embracing the DIY Spirit
Building a custom NAS enclosure is more than just a project – it’s a declaration of independence from the status quo, a statement that you refuse to settle for mediocre performance and bland design.
Ethan Walker
Conclusion
As we wrap up this custom NAS enclosure DIY journey, it’s essential to recap the key elements that make a successful build. From choosing the right materials for your custom NAS case design to implementing effective NAS cooling solutions, each step plays a crucial role in creating a reliable and efficient storage system. By following the step-by-step guide and considering factors like silent builds and custom case design materials, you’ve taken the first steps towards breathing new life into old hardware.
As you complete your project, remember that the true beauty of DIY lies not just in the end result, but in the process of creation itself. The sense of accomplishment and the knowledge gained along the way are invaluable. So, don’t be afraid to experiment, try new things, and push the boundaries of what’s possible with your custom NAS enclosure. With patience, persistence, and a willingness to learn, you can create something truly remarkable and make your DIY project a testament to your ingenuity.
Frequently Asked Questions
What are the most important factors to consider when choosing materials for a custom NAS enclosure?
When choosing materials for your custom NAS enclosure, consider durability, thermal management, and noise reduction. Aluminum and steel are great for durability, while materials like wood or acrylic can help with noise reduction and aesthetics. Think about your specific needs and the environment where your NAS will live.
How can I ensure proper airflow and cooling in my custom NAS enclosure to prevent overheating?
To keep your NAS running cool, make sure to include vents or fans for airflow, and consider using a heatsink or thermal tape to dissipate heat from the hardware. You can also add some clever cable management to improve airflow and reduce dust buildup.
What are some creative ways to repurpose old hardware or materials to build a unique and functional custom NAS enclosure?
Think outside the box and breathe new life into old hardware. Repurpose vintage suitcases, wooden crates, or even retro gaming consoles to create a one-of-a-kind NAS enclosure. Get creative with materials like copper pipes, reclaimed wood, or 3D printed parts to add a personal touch.