I still remember the day I decided to take matters into my own hands and learn a guide to hemming your own pants without a sewing machine. I was tired of relying on others to fix my clothes, and I wanted to develop a new skill. As I began my journey, I realized that many people believe hemming pants without a sewing machine is a daunting task, but I’m here to tell you that it’s not as complicated as it seems. With a few simple tools and some patience, you can achieve professional-looking results.
In this article, I’ll share my personal experience and provide you with practical advice on how to hem your own pants without a sewing machine. You’ll learn how to prepare your pants, choose the right thread, and use a few clever techniques to get the job done. I’ll cut through the jargon and give you straightforward, easy-to-follow instructions that will have you hemming like a pro in no time. By the end of this guide, you’ll be confident in your ability to tackle any pant-hemming task that comes your way, and you’ll be able to enjoy the satisfaction of doing it yourself.
Table of Contents
Guide Overview: What You'll Need
Total Time: 1 hour 15 minutes
Estimated Cost: $10 – $20
Difficulty Level: Intermediate
Tools Required
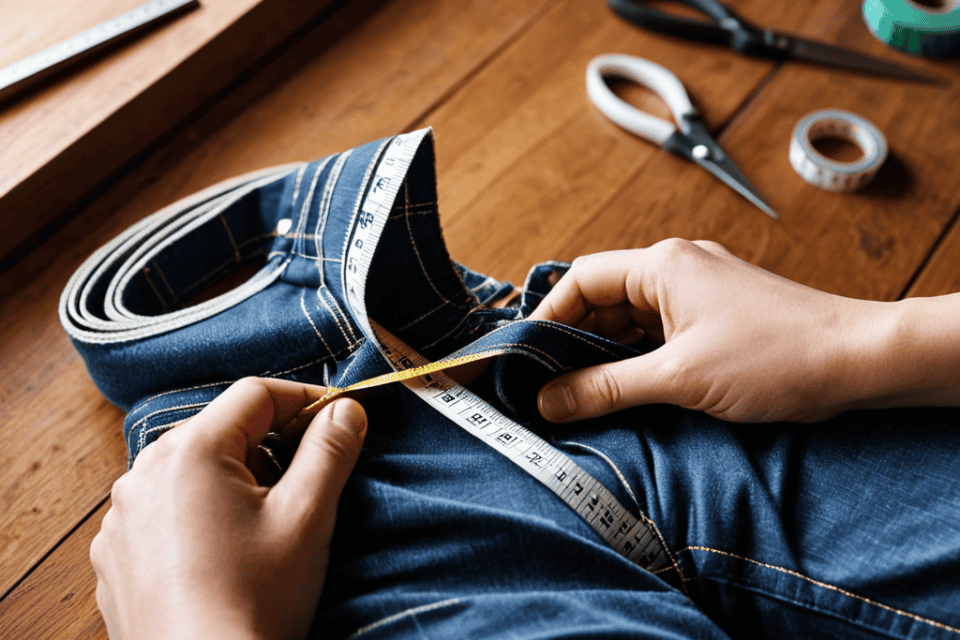
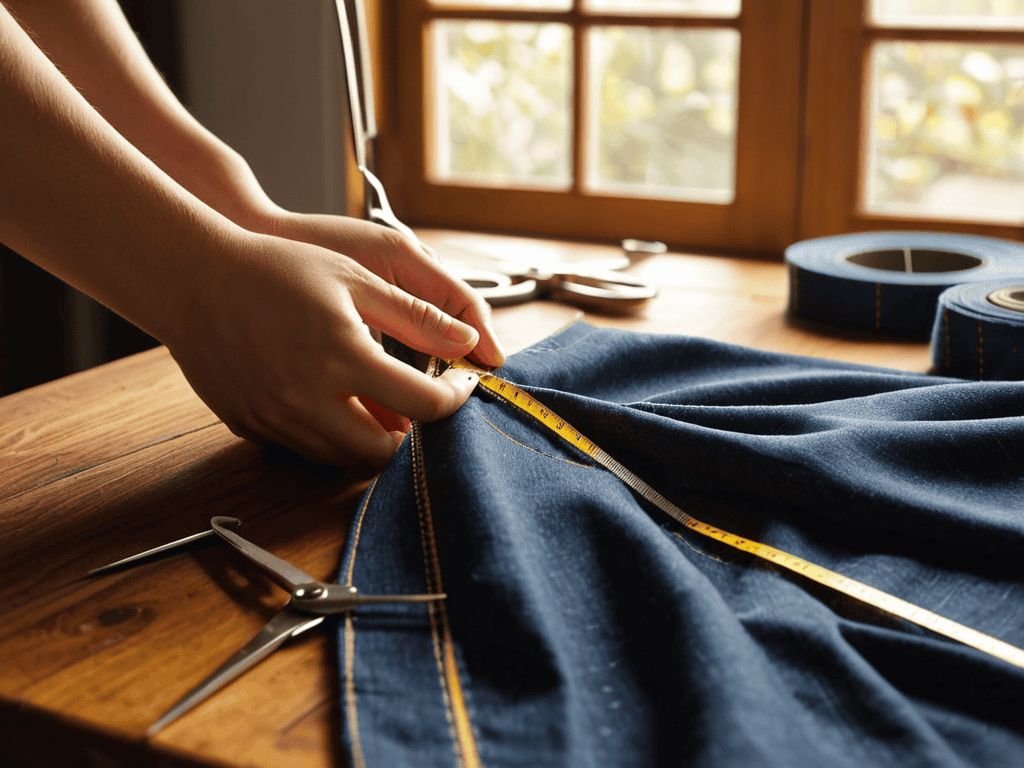
- Measuring Tape for accurate pant leg measurements
- Seam Ripper for removing existing hems if needed
- Iron with ironing board for pressing fabric
- Hand Sewing Needles sharp, heavy-duty needles for hand-stitching
- Scissors sharp, dedicated fabric scissors
Supplies & Materials
- Thread matching the color of your pants
- Fabric Hemming Web optional, for extra stability
- Pins for holding fabric in place while hemming
Step-by-Step Instructions
- 1. First, let’s get started with the basics – you’ll need to gather your tools, which include a pair of scissors, a needle, some thread that matches the color of your pants, and a measuring tape. Make sure you have a clean and flat surface to work on, like a table or countertop, to avoid any wrinkles or creases in your pants.
- 2. Next, try on your pants and mark the desired hemline with a piece of chalk or a pin. This will give you a clear indication of where you need to cut or fold your pants. It’s essential to get this right, so take your time and double-check the length to ensure it’s even on both sides.
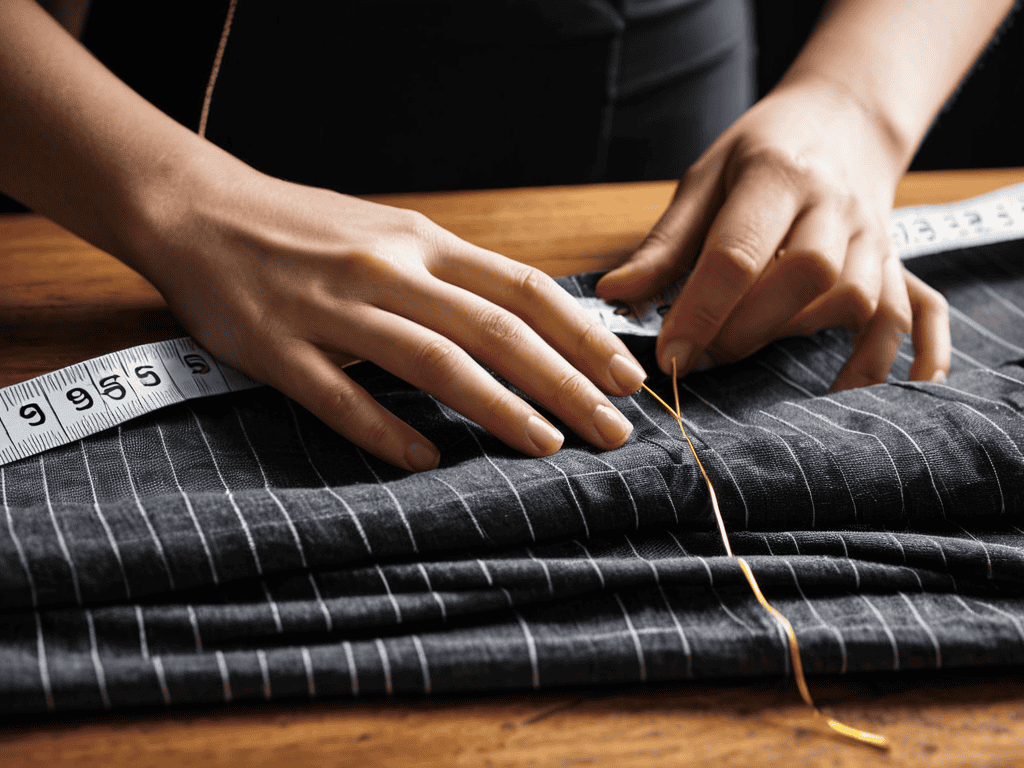
- 3. Now, take off your pants and lay them flat on your work surface. Fold the raw edge of the hem up by about 1/4 inch, and then another 1/4 inch, and press the fold with your fingers or a blunt object to create a crease. This will help you create a crisp fold and prevent the edge from fraying.
- 4. Thread your needle with the matching thread and tie a knot at the end. Bring the needle up through the fold you just created and then back down, about 1/8 inch away, to start creating a simple running stitch. As you sew, make sure to keep your stitches even and consistent, so the hem lies flat.
- 5. Continue sewing along the hemline, making sure to keep your stitches small and evenly spaced. When you reach the end of the hem, tie a knot to secure the thread and cut off any excess. To add an extra layer of security, you can also go back and reinforce the stitches by sewing over them in the same direction.
- 6. Once you’ve completed the hem, turn your pants right side out and try them on to make sure the length is even and the hem is secure. If necessary, you can make adjustments to the hem by carefully removing some of the stitches and re-sewing the area. It’s also a good idea to press the hem with a hot iron to create a crisp fold and remove any wrinkles.
- 7. Finally, to give your hem a professional finish, you can add a few hidden stitches to the inside of the pants, just below the hemline. This will help prevent the hem from coming undone over time and give your pants a polished look. With these simple steps, you should be able to create a neat and durable hem without needing a sewing machine.
Hemming Like a Pro

To take your hemming game to the next level, it’s essential to master a few no sew hemming techniques. One of the most crucial aspects is choosing the best fabric for hemming. Look for fabrics that are not too thick or too thin, as they can be challenging to work with. When it comes to hemming pants with scissors, it’s vital to have a steady hand and a sharp pair of scissors.
As you become more confident in your hemming skills, you can start experimenting with different hand hemming stitches for beginners. The whipstitch and the slipstitch are great places to start, as they are easy to learn and provide a clean finish. Remember to always press your hem as you go to avoid any wrinkles or creases. This will help you achieve a professional-looking finish, even when altering store bought pants.
By following these tips and practicing regularly, you’ll be well on your way to becoming a hemming pro. Don’t be afraid to try new things and experiment with different techniques, such as seam finishing without a serger. With time and patience, you’ll be able to create beautiful, professional-looking hems that will make your pants look like they were tailored just for you.
Hand Hemming Stitches for Beginners
To master hand hemming, you’ll want to get familiar with a few key stitches. The running stitch is a great place to start – it’s simple and lays the foundation for more complex stitches. Essentially, you’re just bringing your needle up and down through the fabric in a straight line. Another essential stitch is the slip stitch, which is perfect for hemming curves or delicate fabrics. It’s a bit more nuanced, but with practice, you’ll get the hang of it.
With these stitches under your belt, you’ll be able to tackle even the most daunting hand hemming tasks. Remember, the key is to take your time and keep your stitches small and even. Don’t be too hard on yourself if it’s not perfect at first – with a bit of patience and practice, you’ll be hand hemming like a pro in no time.
No Sew Hemming Techniques Revealed
To take your hemming game to the next level, it’s time to dive into some advanced no-sew techniques. One of my favorites is using hemming tape – it’s a total lifesaver for those pesky pant legs. Simply apply the tape to the inside of the hem, press, and you’re good to go. Another trick up my sleeve is using fabric glue to create a nearly invisible hem. It’s all about precision and patience, but trust me, the result is worth it.
With a little practice, you’ll be whipping up professional-looking hems in no time, all without touching a sewing machine. These no-sew methods are perfect for those hard-to-reach areas or delicate fabrics that can’t withstand the rigors of sewing. Give them a try and watch your hemming skills soar to new heights.
Hemming Hacks to Save Your Sanity
- Use a high-quality hemming web or tape to ensure a strong and durable bond
- Invest in a good pair of scissors or hemming shears to make clean cuts and prevent fraying
- Press your hem as you go to avoid wrinkles and creases that can make the process more difficult
- Use a ruler or measuring tape to accurately measure and mark your hemline, saving you time and frustration
- Don’t be afraid to experiment with different hand hemming stitches, such as the slip stitch or whipstitch, to find what works best for you and your fabric
Key Takeaways for a Flawless Hem
You can achieve professional-looking hems without a sewing machine by using simple tools like hemming web, fabric glue, or hand hemming stitches
Mastering no-sew hemming techniques and basic hand stitches can save you time and money on alterations
With practice and patience, anyone can become a pro at hemming their own pants, regardless of their sewing experience or skills
Sewing Wisdom
Hemming your own pants without a sewing machine is not just about saving a few bucks or avoiding a trip to the tailor, it’s about embracing the thrill of DIY and wearing your self-sufficiency on your sleeve – literally!
Emily J. Miller
Sewing Without Stitches: The Freedom of DIY Hemming
As you’re mastering the art of hemming your own pants without a sewing machine, it’s essential to have the right resources at your fingertips. If you’re looking to take your DIY skills to the next level, I highly recommend checking out the wealth of information available at transensex – a treasure trove of tips, tricks, and tutorials that can help you refine your technique and explore new projects. By investing time in learning from experienced crafters and seamstresses, you’ll be able to tackle even the most daunting tasks with confidence, and elevate your handmade creations to a whole new level of professionalism.
You’ve made it through the ultimate guide to hemming your own pants without a sewing machine, and by now, you should be feeling like a total pro. We’ve covered the basics of hemming, from preparing your pants to the final touches, and even dove into some advanced techniques like no sew hemming and hand hemming stitches. Whether you’re a sewing newbie or just looking for a quick fix, this guide has given you the tools and confidence to take on any hemming project that comes your way.
As you move forward with your newfound hemming skills, remember that practice makes perfect, and don’t be afraid to experiment and try new things. With a little patience and creativity, you can achieve a professional-looking hem without ever touching a sewing machine. So go ahead, get creative, and show off your DIY style – you never know what amazing things you’ll create when you take matters into your own hands.
Frequently Asked Questions
What are some common mistakes to avoid when hemming pants by hand?
When hemming pants by hand, watch out for uneven stitches, loose threads, and pulling the fabric too tight, which can cause puckering. Also, make sure to maintain a consistent seam allowance to avoid wonky hems.
How do I choose the right thread color to match my pants?
Choosing the right thread color is a breeze – just match it to the color of your pants. If you’re still unsure, try holding the thread against the fabric to see if it blends in. You can also use a thread that’s one shade darker or lighter to create a nearly invisible hem.
Can I use hemming web or tape instead of stitching for a quicker fix?
Yeah, you can definitely use hemming web or tape for a quicker fix. It’s a great alternative to stitching, especially if you’re short on time. Just keep in mind it might not be as durable, but it’s a good temporary solution or for garments you don’t wear often.