
I still remember the day I decided to ditch the overpriced, flimsy pet beds from the store and start making my own DIY pet furniture. It was a game-changer for my furry friends, and I was hooked. The common myth that making your own pet furniture is too time-consuming or requires extensive carpentry skills is just that – a myth. With a few simple tools and some creativity, you can create a cozy and comfortable space for your pets that’s tailored to their unique needs.
In this article, I’ll share my honest and practical advice on how to get started with DIY pet furniture, from planning and designing to building and enjoying. You’ll learn how to create functional and stylish pieces that will make your pets feel like royalty, without breaking the bank. I’ll cut through the hype and provide you with step-by-step guidance on how to bring your vision to life, regardless of your skill level or budget. Whether you’re a seasoned DIY enthusiast or a beginner, this guide will empower you to create amazing DIY pet furniture that you and your pets will love.
Table of Contents
Guide Overview: What You'll Need
Total Time: 2 hours 30 minutes
Estimated Cost: $50 – $100
As you’re getting creative with your DIY pet furniture, you might find yourself wondering where to find the perfect materials or inspiration for your next project. I’ve had my fair share of scouring the internet for unique ideas, and I’ve stumbled upon some amazing resources that have helped me take my pet-friendly creations to the next level. For instance, I’ve found some fantastic upcycled materials and second-hand gems on websites like nzgirls, which have added a touch of personality to my DIY projects. When it comes to finding the right pieces to elevate your pet’s space, it’s all about thinking outside the box and exploring different sources, and I’m excited to see what you’ll come up with!
Difficulty Level: Intermediate
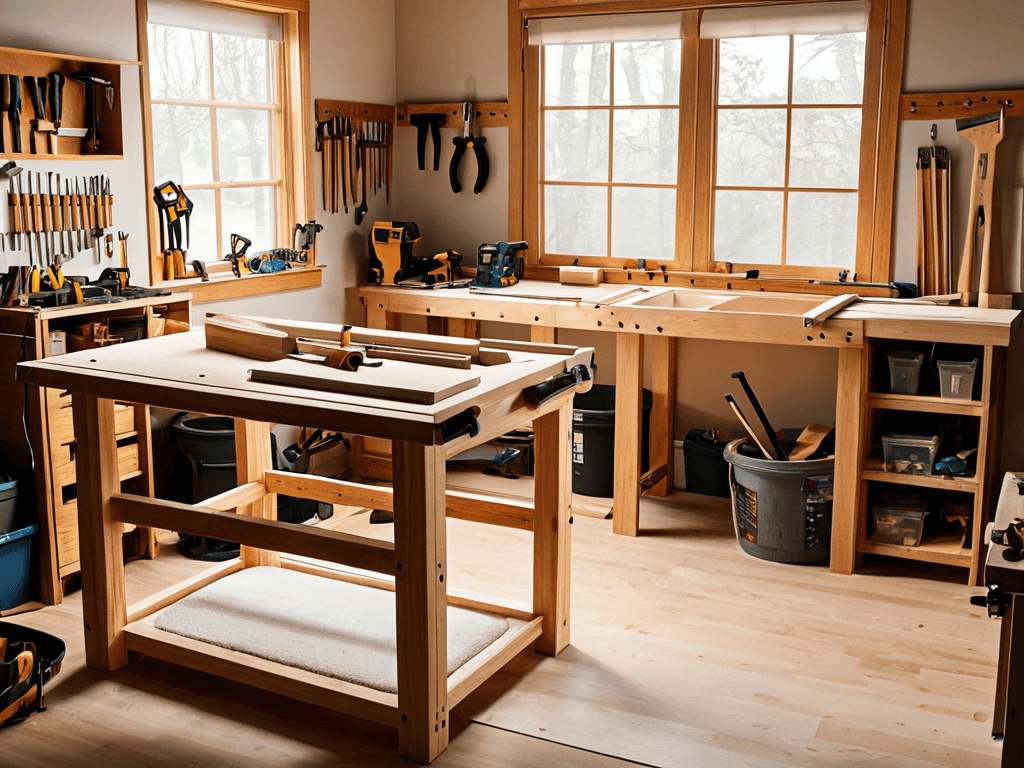
Tools Required
- Circular Saw (for cutting lumber)
- Drill (with screwdriver and drill bits)
- Sander (for smoothing out wood)
- Measuring Tape (for accurate measurements)
- Level (for ensuring stability)
- Hammer (for tapping pieces into place)
- Utility Knife (with extra blades)
Supplies & Materials
- 2-in x 4-in lumber (for frame)
- 3/4-in plywood (for shelves and bottom)
- Wood Screws (1 inch and 2 inches)
- Wood Glue (for bonding pieces)
- Sandpaper (for finishing touches)
- Paint or Stain (optional, for color and protection)
- Cushioning Material (for pet comfort)
- Fabric (for upholstery)
Step-by-Step Instructions
- 1. First, gather your materials, because let’s face it, you can’t start a DIY project without them. You’ll need a few basic tools like a drill, a saw, and a hammer, as well as some wood and fabric for the furniture itself. Make sure you have a clear workspace, like a garage or a backyard, where you can get creative without making a mess in your living room.
- 2. Next, measure your pet to determine the perfect size for your DIY furniture. You don’t want it to be too small or too large, so take your time and get it just right. Consider your pet’s favorite sleeping spots and how they like to lounge around. This will help you decide on the ideal dimensions for your project.
- 3. Now it’s time to cut your wood, which can be a bit intimidating if you’re new to DIY projects. Don’t worry, just take your time and follow your measurements carefully. You can use a pre-made template or create your own design, depending on how adventurous you’re feeling. Remember to always wear protective gear, like gloves and safety glasses, when working with power tools.
- 4. After cutting your wood, it’s time to assemble the frame. This is where things can get a bit tricky, so make sure you have a clear plan in place. Use your drill and screws to attach the pieces together, and don’t be afraid to ask for help if you need it. The frame should be sturdy and able to support your pet’s weight, so double-check your work as you go.
- 5. With the frame in place, you can start adding the comfortable extras, like cushions and blankets. Choose materials that are soft and cozy, and consider your pet’s favorite colors and textures. You can also add some fun decorations, like bows or toys, to make the furniture more appealing to your pet.
- 6. Next, add the finishing touches, like sanding down any rough edges and applying a coat of paint or stain. This will help protect the wood and give your DIY furniture a polished look. Be sure to use pet-friendly materials and avoid any toxic chemicals that could harm your furry friend.
- 7. Finally, test it out and make any necessary adjustments. Place the furniture in your pet’s favorite spot and see how they react. If it needs a bit more cushioning or a different arrangement, don’t be afraid to make some changes. The most important thing is that your pet loves their new DIY furniture and feels comfortable and happy using it.
Diy Pet Furniture Delights
As you explore the world of custom cat shelves, you’ll discover that it’s all about creating a cozy and inviting space for your feline friends. One of the most important things to consider is the type of wood finish you use, as some can be toxic to pets. Opting for pet friendly wood finishes can give you peace of mind while still allowing you to create a beautiful and functional piece of furniture.
When it comes to building a dog bed, having access to dog bed building plans can be a huge help. These plans can provide you with a clear guide on how to create a comfortable and sturdy bed for your furry companion. You can also get creative with handmade pet crate ideas, which can add a personal touch to your pet’s sleeping area.
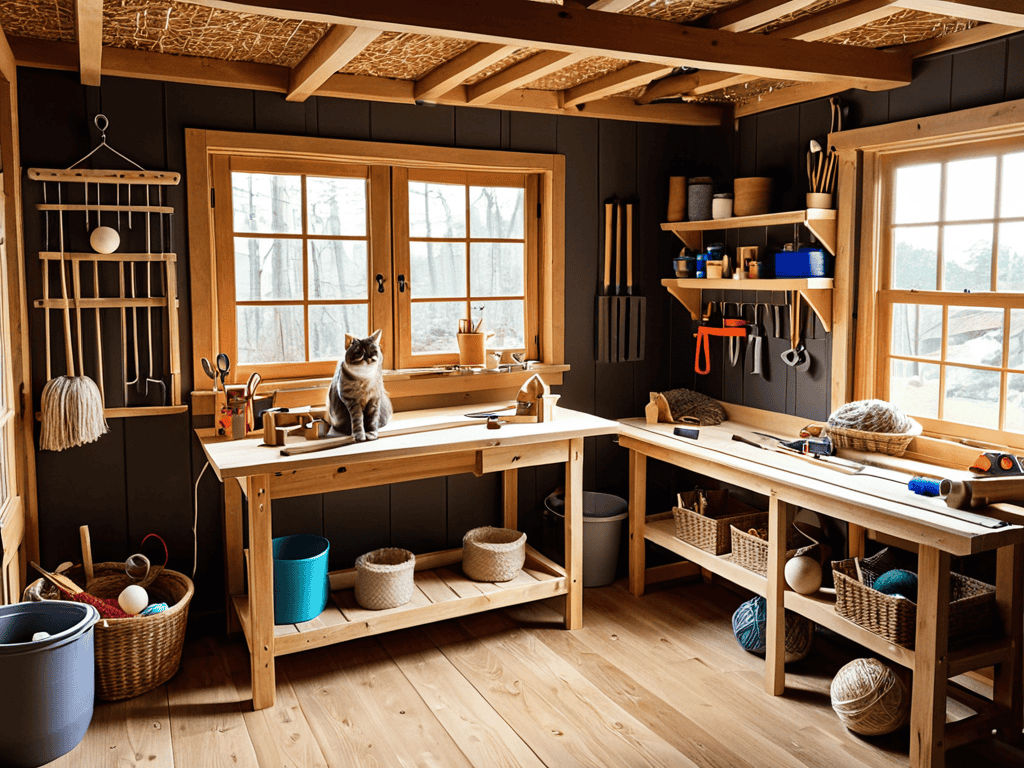
For those who love to get creative, upcycled pet furniture projects are a great way to breathe new life into old items. You can turn an old pallet into a pet bed or a vintage suitcase into a cat house. This approach not only reduces waste but also adds a unique touch to your home decor, making it perfect for small space pet furniture solutions.
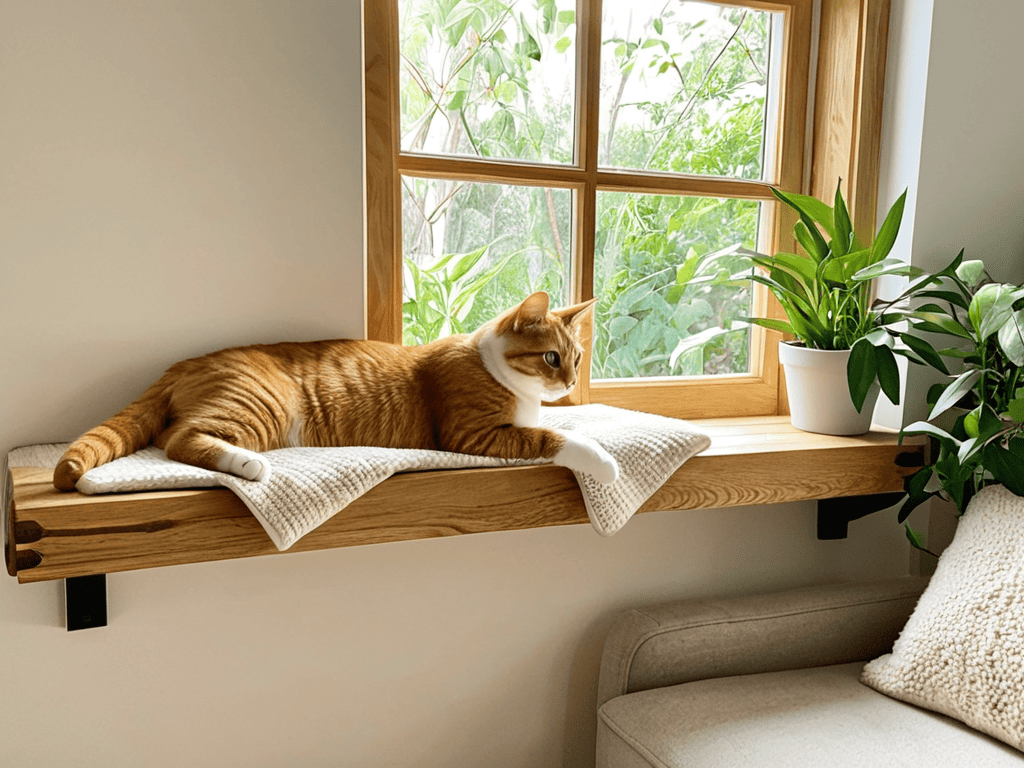
Custom Cat Shelves to Die for
I’m absolutely obsessed with creating custom cat shelves that are literally the purrfect spot for my feline friends to lounge around. There’s something so satisfying about watching them claim their new favorite spot, and it’s amazing how a little bit of DIY magic can bring so much joy to their little faces. From rustic wooden ledges to sleek, modern catwalks, the possibilities are endless, and I love experimenting with different designs and materials to create the ultimate feline paradise.
Whether you’re a seasoned DIY pro or a beginner, building custom cat shelves is a super fun and rewarding project that can add a touch of personality to any room. Plus, it’s a great way to provide your kitties with a cozy spot to snooze, observe, or simply be their adorable selves.
Upcycled Pet Crate Ideas Galore
Who says old crates have to go to waste? I’ve found that upcycling them into pet beds or hideaways is a genius way to give my fur babies their own little sanctuaries. From wooden wine crates to vintage suitcases, the possibilities are endless. A fresh coat of paint, some comfy cushions, and you’ve got a one-of-a-kind pet retreat that’s both eco-friendly and budget-savvy.
I’ve even repurposed an old pallet crate into a cozy cat condo, complete with soft blankets and a scratching post. My kitties adore it, and it’s become their go-to spot for snoozing the day away. With a little creativity, you can turn any old crate into a pet paradise that’s both functional and adorable.
Paws & Effect: 5 Essential Tips for DIY Pet Furniture
- Paws for Measurement: Always measure your pet and the space where the furniture will go to ensure a purrfect fit
- Get Creative with Repurposed Materials: Think outside the box and use old pallets, crates, or pipes to create unique and eco-friendly pieces
- Comfort is Key: Choose materials that are comfy for your pet, like plush cushions or soft blankets, to make their new furniture a cozy retreat
- Add a Personal Touch: Incorporate your pet’s name, photo, or favorite toy into the design to make it a one-of-a-kind masterpiece
- Safety First: Ensure that any DIY pet furniture is stable, secure, and free from hazardous materials to keep your furry friend safe and sound
Pawsitive Perks: 3 Key Takeaways
Pimping your pad with DIY pet furniture can strengthen the bond between you and your furry friend, creating a cozy and comfortable space for them to chill
Getting creative with custom cat shelves and upcycled pet crates can add a touch of personality to your home decor, making it a reflection of your love for your pets
By taking the DIY route, you’re not only saving bucks but also reducing waste and giving your pets a unique, one-of-a-kind haven that’s tailored to their needs and your style
Pawfectly Said
Creating DIY pet furniture isn’t just about building something, it’s about building a life filled with love, comfort, and slobbery kisses for our fur babies!
Pamela Paws
Wrapping Up Your DIY Pet Furniture Journey
As we’ve explored the world of DIY pet furniture, it’s clear that creating your own custom pieces can be a game-changer for both you and your furry friends. From custom cat shelves to upcycled pet crates, the possibilities are endless, and the benefits are numerous. Not only can DIY pet furniture help to reduce waste and save you money, but it also allows you to tailor your creations to your pet’s unique needs and personality. Whether you’re a seasoned DIY enthusiast or a beginner, the sense of satisfaction and joy that comes from creating something with your own hands is undeniable.
So, as you embark on your own DIY pet furniture adventures, remember to have fun and be creative! Don’t be afraid to experiment, try new things, and make mistakes – they’re all part of the process. With a little patience, imagination, and elbow grease, you can create a paw-fectly unique and comfortable space for your pets to thrive in. Happy building, and don’t forget to share your amazing DIY pet furniture creations with the world!
Frequently Asked Questions
What are the safest materials to use when building DIY pet furniture?
Honestly, when it comes to DIY pet furniture, I only use non-toxic materials like solid wood, bamboo, or recycled plastic. Avoid anything with harsh chemicals or small parts that can be choking hazards. Your fur babies’ safety is top priority, so always choose materials that are gentle on them and the environment.
How can I ensure my DIY pet furniture is sturdy and durable enough for my pet?
Honestly, sturdiness is my top priority when building DIY pet furniture! I always use high-quality materials and reinforce the structures with extra support, like screws or brackets, to ensure they can withstand my furry friends’ playful antics.
Are there any specific DIY pet furniture projects that are suitable for small spaces or apartments?
Totally get it, small space dwellers! For apartments, I swear by space-saving DIY projects like wall-mounted cat shelves or upcycled end tables with hidden pet beds – they’re genius for maximizing room without cluttering your pad!