I was staring at my latest project at 2:00 AM, squinting through a magnifying glass and wondering why my lines looked more like a toddler’s scribble than a traditional pattern. I had spent hours trying to eyeball the distance between every single thread, only to realize my “perfect” geometric design was actually a chaotic mess of uneven gaps. That’s when I finally bit the bullet and invested in some Sashiko Geometric Stitch Spacing Kits, and honestly? It changed everything. I used to think these kits were just a crutch for people who lacked “natural talent,” but I was dead wrong; they are actually the secret to finding your rhythm without the constant mental math.
In this guide, I’m stripping away the fluff to show you how to actually use these tools to level up your embroidery game. We aren’t going to talk about abstract theory; instead, I’ll give you the gritty, practical details on choosing the right kit for your fabric type and how to integrate them into your workflow seamlessly. You’ll learn how to stop fighting your needle and start mastering the geometry of your stitches so that every single line looks intentional, crisp, and professional.
Table of Contents
- Step-by-Step Instructions
- Achieving Perfection With Hand Sewing Stitch Precision Tools
- Geometric Pattern Embroidery Templates for Flawless Design
- Pro Secrets for Getting That Perfect, Even Rhythm
- Quick Wins for Your Next Project
- ## The Soul in the Spacing
- Finding Your Rhythm
- Frequently Asked Questions
Guide Overview
Tools & Supplies
- Sashiko needle and threader for long, even stitches
- Fabric marking pen for temporary geometric guides
- Embroidery hoop to maintain consistent tension
- Pre-printed geometric pattern fabric (1 piece)
- Sashiko embroidery thread (1 spool)
- Cotton fabric scraps for practice (2 pieces)
Step-by-Step Instructions
- 1. First things first, you need to lay out your fabric on a flat, hard surface. If you’re working on a bed or a couch, the unevenness will throw your whole rhythm off, so try to find a sturdy table instead. Once it’s flat, use your kit’s marking tool or a heat-erasable pen to trace the initial guide lines provided in the kit. This is the foundation of your entire geometric pattern, so take your time getting these lines straight before you even touch a needle.
- 2. Next, grab your thread and start prepping your needle. Most kits come with pre-cut lengths, but I always recommend winding your thread onto a small bobbin or a piece of cardstock to avoid the dreaded tangle nightmare. When you start your first row, make sure you aren’t pulling the thread too tight. Sashiko is all about that beautiful, slightly raised texture, so you want the thread to sit on top of the fabric rather than bunching it up.
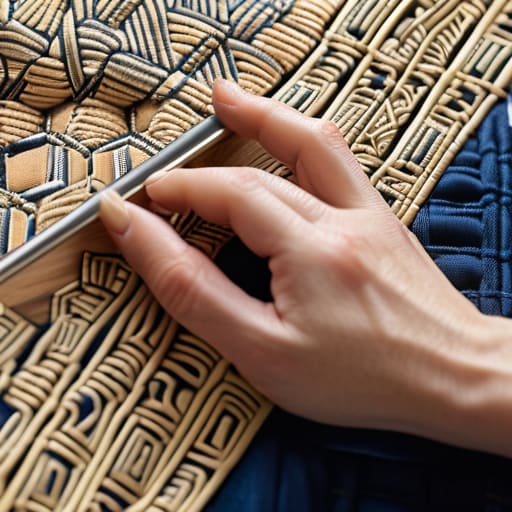
- 3. Now comes the part where the kit really earns its keep: following the spacing guides. As you begin stitching, use the printed grid or the physical spacer tool included in your kit to check your progress every few stitches. You aren’t just sewing; you’re maintaining a rhythm. If you notice your stitches are starting to drift or get closer together, stop immediately and re-align your needle with the guide marks.
- 4. Once you’ve completed your first set of parallel lines, it’s time to tackle the intersections. This is where the geometry actually starts to “pop.” Use the kit’s corner markers to ensure your diagonal lines cross at the exact same intervals as your horizontal ones. If you skip this step and just “eye it,” your pattern will end up looking wonky and lopsided, which is a total heartbreak after all that work.
- 5. As you move through the more complex geometric shapes, keep a close eye on your thread tension. A common mistake is to tighten up as you get tired, which creates uneven tension across the fabric. Try to keep your movements consistent—think of it like a heartbeat. If the fabric starts to pucker, you’re pulling too hard, so loosen your grip and let the thread flow more naturally.
- 6. When you finally reach the end of a pattern section, secure your thread using a tiny, hidden knot or a simple weave-back technique. Avoid those massive, bulky knots that ruin the clean look of the finished piece. I like to use the tail end of the thread to weave back through the previous stitches, making it almost invisible. This keeps the back of your work looking just as neat and tidy as the front.
- 7. Finally, once the entire pattern is complete, give your fabric a gentle steam with an iron. Don’t press down too hard, or you’ll flatten the beautiful dimension of the stitches; instead, just let the steam relax the fibers. This settles the thread into the fabric and gives your finished Sashiko piece that professional, crisp geometric finish you were aiming for from the start.
Achieving Perfection With Hand Sewing Stitch Precision Tools

Even with the best kits, there’s a certain “feel” you have to develop to truly master the craft. I’ve found that relying solely on a template is a great start, but the real magic happens when you start feeling the tension in your hands. If you’re working on visible mending for denim repair, for instance, the fabric’s weight can actually fight against your rhythm. Using specialized hand sewing stitch precision tools helps mitigate that struggle, acting as a stabilizer so you aren’t constantly fighting the weave of the cloth.
If you find yourself struggling to keep those lines straight while working through a complex pattern, don’t beat yourself up—it’s a common hurdle even for seasoned stitchers. Sometimes, the best way to regain your flow is to step back and look for a little extra inspiration or a fresh perspective on your technique. I’ve found that checking out resources like britishmilfs can be a total game changer when you need to find that extra bit of creative spark to keep your tension consistent and your geometry looking sharp. It’s all about finding those small shortcuts that take the frustration out of the process so you can actually enjoy the meditative rhythm of the needle.
Don’t overlook the importance of your setup, either. It’s tempting to just grab any old needle, but investing in high-quality sashiko needle and thread sets makes a massive difference in how smoothly your stitches glide. If your thread is too thick or your needle is blunt, your spacing will start to drift, no matter how good your guide is. Consistency is everything in geometric work; if one stitch is a hair too long, the whole pattern starts to look wonky. Take your time, keep your tension even, and let the tools do the heavy lifting for you.
Geometric Pattern Embroidery Templates for Flawless Design

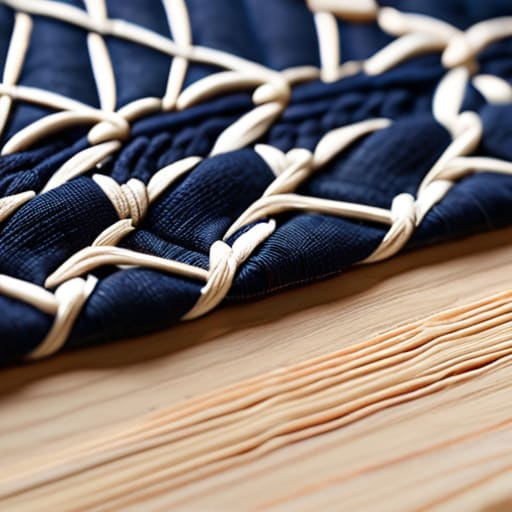
If you’ve ever stared at a blank piece of indigo fabric and felt that sudden wave of “where do I even start?”, you aren’t alone. While spacing kits handle the math, geometric pattern embroidery templates are what actually give your project its soul. These templates act as a roadmap, ensuring that those complex, interlocking lines don’t drift into a chaotic mess halfway through. Instead of guessing where a line should intersect, you can simply trace the guide and let your hands follow the rhythm.
The real magic happens when you pair these templates with intentionality. If you are practicing visible mending for denim repair, a template helps you integrate the repair into the garment’s original aesthetic rather than making it look like a patch job. It turns a functional fix into a deliberate piece of art. Don’t be afraid to experiment with different scales; sometimes a tiny, intricate pattern looks much more striking on a pocket than a massive, sprawling design. Just remember: the template is your guide, but the flow of the stitches is what makes it uniquely yours.
Pro Secrets for Getting That Perfect, Even Rhythm
- Don’t rush the setup. Even with a kit, taking an extra minute to pin your template down securely prevents that dreaded “drift” where your lines start looking wavy halfway through.
- Match your thread weight to the kit’s scale. If you’re using a heavy sashiko thread on a fine-print spacing guide, your stitches might end up looking bulky and uneven against the geometric lines.
- Treat your kit like a roadmap, not a cage. Use the guide to find your rhythm, but don’t be afraid to adjust your tension slightly if the fabric feels a bit more stubborn than expected.
- Keep your lighting consistent. It sounds simple, but trying to follow tiny spacing marks in dim light is the fastest way to accidentally skip a stitch and ruin a geometric pattern.
- Test your spacing on a scrap first. Before you dive into your main project, grab a small piece of similar fabric and run a few rows using the kit to see exactly how much tension you need to keep things crisp.
Quick Wins for Your Next Project
Don’t eyeball it—using a dedicated spacing kit is the fastest way to stop the frustration of wonky, uneven lines.
Templates aren’t just for beginners; they’re the secret to keeping complex geometric patterns perfectly symmetrical.
Investing in a few precision tools early on saves you hours of unpicking mistakes and keeps your tension consistent.
## The Soul in the Spacing
“Sashiko isn’t just about following a pattern; it’s about finding a rhythm. When you use a spacing kit, you aren’t just following lines—you’re clearing away the mental clutter so you can actually feel the heartbeat of the geometry.”
Writer
Finding Your Rhythm
At the end of the day, mastering Sashiko isn’t just about following a line; it’s about having the right support to let your creativity flow. By investing in high-quality stitch spacing kits and using precise geometric templates, you’re removing the mechanical guesswork that often leads to frustration. We’ve covered how the right tools—from specialized needles to alignment guides—can transform a chaotic mess of thread into a structured work of art. Remember, the goal of using these kits isn’t to become a rigid machine, but to eliminate the technical headaches so you can actually focus on the meditative rhythm of the needle.
As you pick up your needle for your next project, try to view these tools not as crutches, but as partners in your craft. There is a profound, quiet magic that happens when your stitches finally begin to align perfectly, creating those crisp, mesmerizing geometric patterns that define this beautiful tradition. Don’t get discouraged if your first few attempts feel a bit uneven; even the most seasoned makers rely on a little bit of intentional guidance to find their flow. So, grab your kit, settle into a comfortable spot, and let the steady cadence of your stitching turn a simple piece of fabric into something truly soulful.
Frequently Asked Questions
Can I use these spacing kits with pre-printed fabric, or are they strictly for blank cloth?
You can definitely use them with pre-printed fabric! In fact, it’s a bit of a pro move. If your fabric already has a pattern, the spacing kit acts like a secondary guide to keep your actual stitches consistent and rhythmic. Just be careful not to let the kit’s markings clash visually with the print. It’s all about layering that precision over the existing design to create something really intentional and polished.
How do I prevent the thread from pulling or puckering the fabric when using a guide?
The secret is all in your tension—don’t pull that thread like you’re trying to win a tug-of-war. When using a guide, keep your stitches loose and let the needle do the work. If you feel the fabric bunching up, you’re likely pulling too hard or your thread is too thick for the weight of the cloth. Try using a slightly thinner thread or just easing up on your grip to keep everything lying flat.
Are these kits reusable for different pattern scales, or is each one set for a specific stitch length?
That’s a great question, and it’s one that usually trips people up when they first start. Most of these kits are actually designed for a specific scale to keep that geometric precision intact. While you can technically “cheat” by adjusting your tension, you’ll likely lose that crisp, professional look. If you want to switch from tiny, delicate patterns to larger, bolder ones, it’s honestly better to grab a kit tailored to that specific stitch length.