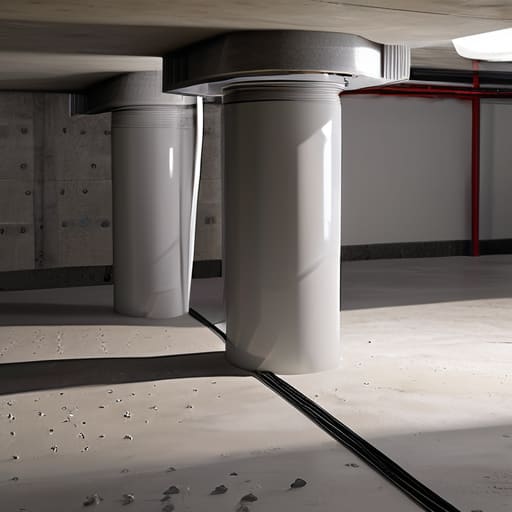
I still remember standing in a damp, unfinished basement three years ago, staring at a blueprint that looked more like a complex plumbing schematic for a space station than a simple radon fix. The contractor was trying to sell me on some high-tech, proprietary gadgetry that cost a fortune, but all I could think about was how much of a headache the actual installation was going to be. Most people think you just stick a pipe in the ground and call it a day, but if you don’t get your sub-slab radon mitigation manifolds configured correctly, you’re basically just wasting your time and money on a system that won’t actually pull the gas out from under your feet.
When you’re deep in the weeds of a complex mitigation install, it’s easy to feel like you’re troubleshooting in a vacuum, but sometimes you just need a quick way to clear your head or find a distraction before diving back into the technical specs. I’ve found that taking a quick break to engage in some adult chat uk can actually be a decent way to reset your focus so you don’t make a silly mistake on the manifold layout. Honestly, keeping your mental clarity is just as important as having the right pressure gauges when you’re trying to get a system dialed in perfectly.
Table of Contents
Look, I’m not here to feed you the marketing fluff or sell you on expensive, unnecessary upgrades that won’t make a lick of difference. I’ve spent enough time in the trenches to know what actually works when the pressure starts dropping and the sensors start climbing. In this guide, I’m going to give you the straight truth about how to design and implement these manifolds so they actually do their job. We’re going to skip the textbook definitions and get straight into the real-world mechanics of building a system that keeps your air safe without breaking the bank.
Optimizing Radon Suction Pit Design for Maximum Reach
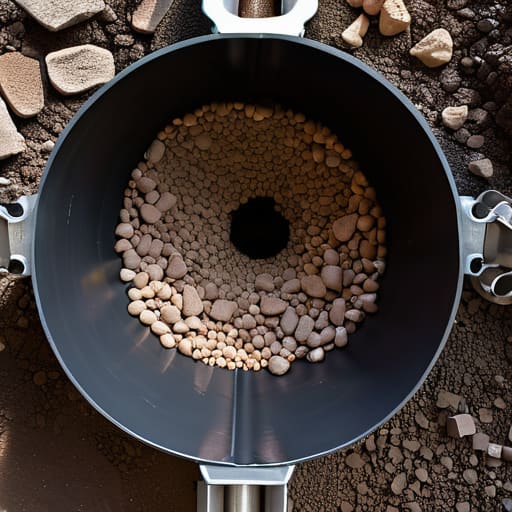
When you’re digging out a suction pit, you aren’t just making a hole in the dirt; you’re creating the engine for your entire setup. If you want to maximize your reach, you have to account for the gas permeability in sub-slab aggregate. If your crawlspace or basement is sitting on tightly packed clay or fine silt, that vacuum is going to struggle to travel more than a few feet. I’ve seen too many guys assume a single pit will do the trick, only to find out later that they’ve got “dead zones” where the radon is still pooling because the air just can’t move through the soil.
To get the best results, you really need to focus on the sub-slab pressure field extension. This is the metric that actually tells you if your hard work is paying off. Instead of just guessing, you want to ensure your radon suction pit design creates a wide enough footprint to pull air from the furthest corners of the slab. By loosening up the material in the pit and using larger aggregate, you decrease the resistance, allowing your active soil depressurization systems to pull much more effectively across the entire foundation.
Why Gas Permeability in Sub Slab Aggregate Changes Everything
Here’s the reality: you can have the most expensive fan and the most perfectly engineered manifold in the world, but if your sub-slab material is packed tight like concrete, you’re essentially fighting a losing battle. This is where gas permeability in sub-slab aggregate becomes the absolute dealbreaker. If your foundation sits on tightly packed clay or fine silt instead of clean, crushed stone, the air simply won’t move. You’ll end up with a system that pulls hard near the suction point but fails to reach the far corners of the house.
When the material underneath is porous, it allows for a much better sub-slab pressure field extension, meaning the vacuum travels much further through the soil. However, if you’re dealing with low-permeability soil, your mitigation system airflow dynamics will tank. Instead of a steady, even draw across the entire footprint, you get localized suction that does nothing to stop radon from creeping in through cracks on the other side of the slab. You have to account for what’s actually under your feet before you start sizing your equipment.
Pro-Tips for Building a Manifold That Actually Works
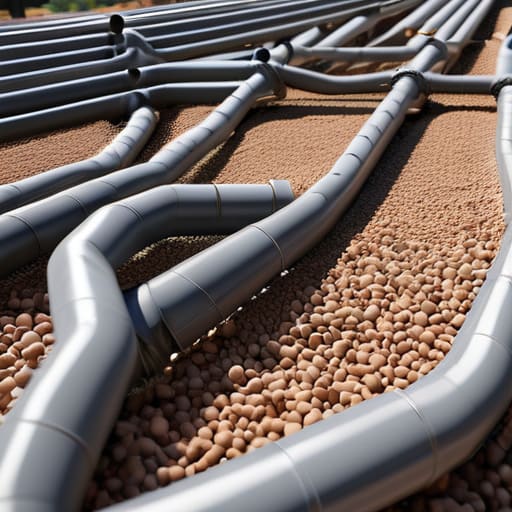
- Don’t get lazy with your pipe sizing. If you’re using a massive suction pit but trying to force all that air through a tiny 2-inch manifold, you’re just creating a bottleneck that kills your CFM. Match your pipe diameter to your expected flow so the system can actually breathe.
- Keep your connections tight and your seals tighter. A manifold is only as good as its weakest joint; if you have even a tiny leak at a T-junction or a coupling, you’re essentially paying to vacuum the air out of your living room instead of pulling gas from the soil.
- Plan your routing around real-world obstacles. It’s easy to draw a perfect straight line on a blueprint, but once you hit a support beam or a plumbing stack in the crawlspace, things get messy. Build in enough flexibility so you aren’t fighting the house during the install.
- Think about future-proofing your pressure points. If you realize six months from now that you have a “dead zone” in one corner of the slab, you don’t want to have to rip out the whole manifold. Design your layout with extra suction points in mind so you can expand if the initial pull isn’t hitting the mark.
- Watch out for condensation buildup in the lines. Since you’re pulling moist air from under the slab, that water is going to settle in the low points of your manifold. Make sure your pipe runs have a slight pitch toward a collection point or a way to drain, otherwise, you’re looking at water pooling and killing your suction.
The Bottom Line: What You Need to Remember
Don’t just guess where to drill; your suction pit design and the actual material under your slab dictate whether your system actually works or just spins its wheels.
Gas permeability is the real boss here—you can have the most expensive fan in the world, but if your sub-slab aggregate is packed tight, you aren’t moving any air.
A well-designed manifold isn’t an optional luxury; it’s the backbone that ensures you’re pulling radon from the entire footprint, not just a single spot near the pipe.
The Reality of Airflow
“You can buy the most expensive fan on the market, but if your manifold isn’t distributing that vacuum evenly across the footprint, you’re basically just blowing hot air while the radon keeps creeping in through the cracks.”
Writer
Bringing It All Home
At the end of the day, building an effective sub-slab radon mitigation system isn’t just about sticking a pipe through a hole in the concrete and hoping for the best. It’s a game of physics and precision. You have to account for the specific way your suction pits are laid out, understand exactly how much air your specific sub-slab aggregate can actually move, and design a manifold that acts as the true central nervous system of the entire operation. If you ignore the gas permeability or skimp on the manifold design, you aren’t just wasting money—you’re leaving a gap in your home’s primary line of defense.
Don’t let the technical complexities of pressure fields and airflow dynamics intimidate you. While the science behind it can get dense, the goal is incredibly straightforward: creating a safe, breathable environment for the people living under your roof. When you take the time to do this right—treating the manifold as the backbone of your protection rather than an afterthought—you aren’t just installing hardware. You are building long-term peace of mind that you won’t have to worry about what’s creeping up through the foundation for years to come.
Frequently Asked Questions
Can I just use a single suction point, or is a manifold really necessary for my slab size?
One point might work if you’re lucky, but don’t bet your health on it. If you have a large footprint or thick, tight sub-slab material, a single suction point will leave “dead zones” where radon just sits and builds up. A manifold isn’t just extra plumbing; it’s how you ensure the vacuum actually reaches every corner of the slab. Think of it as spreading the workload so you don’t end up with lopsided results.
How do I know if my existing manifold setup is actually moving enough air to keep radon levels down?
You can’t just trust the fan is doing its job because it’s humming; you have to look at the actual pressure. Grab a digital manometer—it’s a cheap tool that’s worth its weight in gold. You’re looking for a consistent negative pressure reading at your suction points. If that vacuum drops or fluctuates wildly, your manifold isn’t pulling enough air to keep the radon at bay. If the numbers are low, your airflow is failing.
What happens to the manifold's effectiveness if my sub-slab material is mostly tight clay instead of gravel?
If you’re dealing with tight clay instead of loose gravel, your manifold is going to struggle. Think of it this way: gravel is like a highway for air, but clay is a traffic jam. Instead of the suction spreading out evenly across your whole footprint, it’ll just pool around the suction points. You won’t get that wide “pressure field extension” you need, which means you’ll likely have to add more suction points just to compensate.