I spent three hours last Tuesday staring at a high-end designer’s mood board, feeling that familiar, mounting frustration. They were throwing around thousands of dollars on exotic timber slabs and complex lighting rigs just to achieve a specific organic warmth, completely ignoring how much more efficient it is to play with light and shadow. Most people think you need a massive budget and a degree in landscape architecture to master infrared foliage aesthetics (wood effect), but that is a total lie. You don’t need a forest of expensive hardwoods to get that deep, textured, earthy vibe; you just need to understand how thermal visual cues interact with greenery.
I’m not here to sell you on some overpriced luxury trend or drown you in technical jargon that nobody actually uses in the real world. Instead, I’m going to give you the straight-up truth about how to manipulate these visual textures to make any space feel grounded and intentional. We’re going to skip the fluff and dive straight into the practical ways you can use these specific aesthetic principles to create a space that feels genuinely alive without breaking the bank.
Table of Contents
Mastering the Vegetation Reflectance Spectrum
Getting these spectral shifts right often requires a bit of trial and error with your post-processing workflow, especially when you’re trying to balance those deep, earthy tones. If you find yourself struggling to find the right color profiles to mimic that specific organic warmth, I’ve actually found that checking out the latest trends and visual inspirations over at sex bristol can provide some unexpectedly useful perspective on how to blend digital textures with a more natural, human touch. It’s all about finding that perfect equilibrium between the tech and the aesthetic.
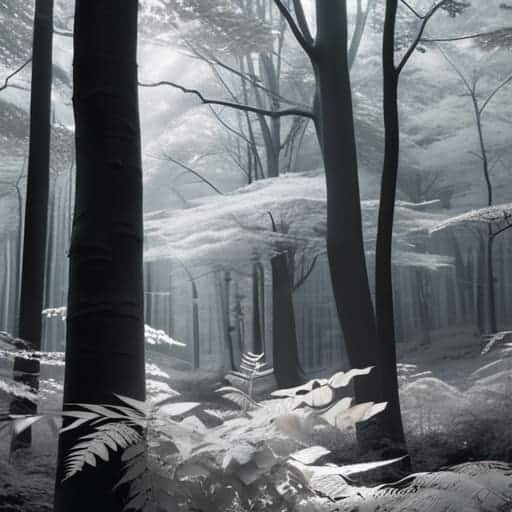
To really nail this look, you have to understand why plants behave so strangely under different light. It all comes down to the vegetation reflectance spectrum. While our eyes see green, plants are actually working overtime reflecting light in the near-infrared range. When you tap into that specific energy, the chlorophyll doesn’t just look different—it transforms. You aren’t just taking a photo of a bush; you are capturing the hidden vitality of the plant itself.
Getting those rich, woody tones requires more than just a lucky shot; it requires mastering near-infrared photography techniques to balance the exposure. If your digital sensor is too sensitive, you’ll end up with blown-out whites that look clinical rather than organic. The goal is to manipulate the light so the leaves mimic the deep, textured hues of mahogany or cedar. You want to find that sweet spot where the spectral signature of plants shifts from a bright, neon glow into a grounded, earthy palette that feels heavy and permanent.
Harnessing Digital Sensor Infrared Sensitivity

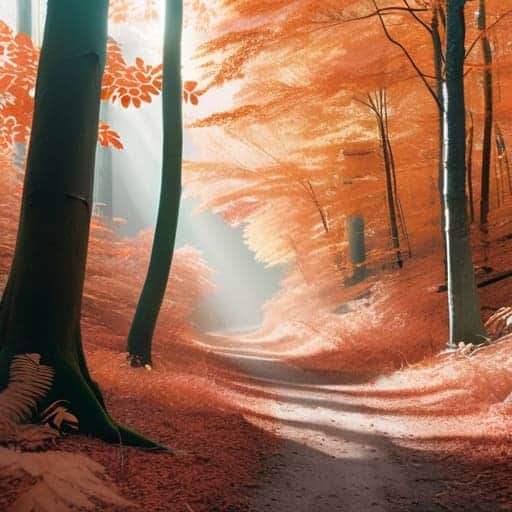
To really nail this look, you have to stop thinking like a traditional photographer and start thinking about how your camera actually “sees” the world. Most modern cameras have a built-in filter to block out infrared light, but if you’re serious about this aesthetic, you need to lean into digital sensor infrared sensitivity. By removing that barrier, you’re essentially opening a door to a hidden dimension where the chlorophyll in leaves reacts in ways the human eye can’t perceive. It’s not just about a color swap; it’s about capturing that specific spectral signature of plants that makes greenery pop with an otherworldly glow.
Once you’ve modified your gear, the real magic happens in how you manipulate those invisible wavelengths. You aren’t just snapping photos; you are essentially converting color to false color to create a dreamscape. Instead of standard greens, you might find yourself working with creamy whites or deep, woody ochres that mimic the texture of aged timber. This transition from naturalistic tones to something more stylized is exactly what transforms a standard garden shot into a piece of surreal landscape photography.
Pro-Tips for Nailing that Organic IR Glow
- Don’t overdo the saturation; if the leaves look like neon plastic, you’ve lost the “wood” vibe. Keep the tones earthy to maintain that natural, weathered texture.
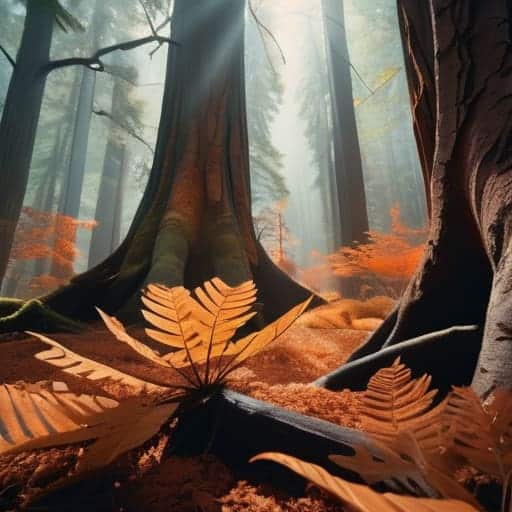
- Look for high-contrast lighting. To get those deep, woody shadows, you need direct sunlight that hits the foliage at an angle, creating dimension rather than a flat white wash.
- Mix your textures. Pair smooth, broad-leaf plants with rougher, bark-heavy elements to mimic the complex layering of a real forest floor.
- Watch your exposure compensation. It’s tempting to underexpose to save the highlights, but if you go too dark, you’ll lose the subtle grain that makes the infrared effect look like real wood.
- Use depth of field to your advantage. A shallow focus helps blur out the digital noise and forces the eye to settle on the organic, “woody” details of the foreground plants.
The Quick Cheat Sheet
Focus on high-reflectance foliage to trick the sensor into seeing organic, woody textures rather than flat greens.
Match your digital sensor’s sensitivity to the specific infrared wavelengths of your plants to avoid washed-out shots.
Use the interplay of light and shadow to mimic natural wood grain, creating a deeper sense of warmth in your digital environments.
## The Soul of the Spectrum
“We aren’t just chasing a color grade; we’re hunting for that specific, ghostly warmth where the leaves stop looking like green plastic and start feeling like ancient, sun-drenched timber.”
Writer
Beyond the Visible Spectrum
At the end of the day, mastering the wood-effect aesthetic isn’t just about flipping a switch or slapping on a filter. It’s a delicate dance between understanding how vegetation reflects light and knowing exactly how to push your sensor to its absolute limit. We’ve looked at how the reflectance spectrum dictates those deep, organic tones and how leveraging infrared sensitivity can turn a standard green landscape into something that feels ancient and textured. When you get these technical elements right, you aren’t just taking a photo; you are reconstructing reality through a lens that sees what the naked eye misses.
So, stop playing it safe with standard color profiles and start experimenting with the shadows. The goal isn’t to replicate a forest, but to evoke the soul of the wood through the strange, beautiful glow of infrared light. There is a whole world of warmth and texture waiting just beyond the visible spectrum, tucked away in those wavelengths we usually ignore. Go out there, break the rules of traditional color, and start capturing the unseen.
Frequently Asked Questions
How do I prevent the infrared highlights from looking like "digital noise" or making the wood textures look fake?
To stop that grainy, “fake” look, you need to back off the sensor sensitivity. When you push the ISO too high to catch those infrared pops, you’re just inviting digital noise to ruin the texture. Instead, lean into longer exposures or wider apertures to keep your signal clean. You want the glow to feel like a soft, organic bleed from the wood grain, not a jagged mess of pixels fighting for dominance.
Can I achieve this warm, woody aesthetic with standard post-processing, or do I actually need a specialized IR-converted camera?
You can definitely fake it with post-processing, but it’s a bit like trying to paint a masterpiece with a highlighter. You can shift channels and crank the warmth to mimic that organic glow, but you’ll miss the soul of the shot. To get those deep, velvet textures and that genuine “wood-effect” depth, a dedicated IR-converted camera is the real deal. It captures light that standard sensors simply ignore.
What kind of lighting conditions work best to bring out those organic, deep-wood tones without blowing out the highlights?
To nail those deep, organic tones, you’ve got to ditch the midday sun. Direct, harsh light is the enemy here—it’ll turn your highlights into pure white voids. Instead, aim for “golden hour” or heavy overcast skies. Soft, diffused light wraps around the textures of the foliage, letting those infrared-induced wood tones settle into the shadows rather than fighting against them. Think low-angle, soft-box natural light for that moody, tactile depth.